First Contact: Hello World!
Updated 2 April 2026: Corrected stale links.
After the IRQ post, I started looking for the shortest path to get something simple to work. The idea is to bring up something small, an embryonic version of the project. Iteratively, I then keep growing this small system until I end up with a system that meets the goals. After each iteration, the project should be functioning somewhat better than it was before.
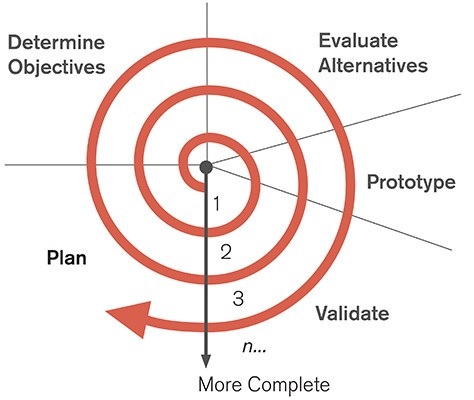 Iterative Design Spiral
Halfway through the first iteration, I realized I needed to figure out my git workflow, or I wouldn’t be able to commit and push my work. Hence, the previous post.
The Tiny System
Now, back to taking that first step: I want to bring up the RISCV processor and run a test program on it that can print to the serial port. In other words, I want to run a ‘Hello World!’ program on my Arty A7-35T. Doing so will give us access to print-style debugging, which is sure to come in handy down the road.
To get to ‘Hello World’, I need to put together a tiny system consisting of the following cores:
- Ibex RISCV processor (to run the SW).
- Internal memory (to hold the SW).
- wbuart32 (serial port console).
- A Wishbone interconnect to connect the processor to memory and the UART core.
The Ibex repository includes an example system, called Simple System, that’s similar to the initial system I have in mind, but it does not include a Wishbone interconnect. It shouldn’t be too hard to add a Wishbone interface to Ibex myself, but first I should take a look around to see if a Wishbone-for-Ibex solution already exists. Lo and behold it does:
https://github.com/batuhanates/ibex_wb
The ibex_wb SoC Cores
The ibex_wb SoC includes the following cores:
- ibex: The RISCV CPU core. The ibex_wb project was pointing to a 3-year-old version. I modified it to use the BoxLambda ibex fork.
- wbuart32: UART core. The ibex_wb project was pointing to a 3-year-old version. I modified it to use the BoxLambda ibex fork.
- riscv_dbg: JTAG debug interface. This is a pretty complex core. I ifdef’d it out for the time being. To be revisited.
- wb_gpio: GPIO core, for sampling buttons and switches and driving LEDs.
- wb_timer: A timer core, so we can do things like *usleep(
)* from software. - spramx32: Single Port RAM. To be replaced at some point by a Dual-Port RAM.
- core2wb/core_if/wb_if/slave2wb: Ibex to Wishbone interfacing logic.
The ibex_wb/soc/fpga/ directory has an SoC build for Cyclone V, the Arty A7-100T, and the Nexys4-DDR. I added an arty-a7-35/ subdirectory, using the Nexys4-DDR SoC code as a starting point.
This ibex_wb SoC is pretty much a perfect match for the initial system I had in mind. How convenient!
The ibex_wb SoC Software
The software is located in the ibex_wb/soc/fpga/arty-a7-35/sw/ directory:
- libs/soc/ contains drivers for the cores
- examples/ contains example programs. I tested the hello and the blinky programs.
ibex_wb/soc/fpga/arty-a7-35/sw/examples/hello/ contains a simple Makefile to build the software and generate a hello.mem file. hello.mem holds the initial contents of the internal memory of the SoC. The file’s contents are included in the FPGA bitstream.
The same directory also contains a linker script, link.ld, that specifies how much memory is available, and where all the code, data, and stack should go:
OUTPUT_ARCH(riscv)
...
MEMORY
{
	ram         : ORIGIN = 0x00000000, LENGTH = 64K
}

_min_stack      = 16K;   /* minimum stack space to reserve */
_stack_start	= ORIGIN(ram) + LENGTH(ram) - 4;
...
SECTIONS
{
	.vectors : ...

	.text : { ...

	.data : { ...

	.bss : { ...

	.stack (NOLOAD): {
		. = ALIGN(4);
		. = . + _min_stack ;
		. = ALIGN(4);
		stack = . ;
		_stack = . ;
	} > ram
    ...
}
ORIGIN should be set to match the CPU’s boot vector. On the FPGA side, the boot vector is specified during CPU core instantiation. I currently have it set to 0 in ibex_soc.sv:
wb_ibex_core wb_ibex_core (
.instr_wb     (wbm[COREI_M]),
.data_wb      (wbm[CORED_M]),
.test_en      (1'b0),
.hart_id      (32'h0),
.boot_addr    (32'h0),
...
Synthesizing the SoC
The original ibex_wb repository appears to be dormant or abandoned in an unpolished state. There’s no documentation, Makefile, or other type of project file that specifies how the SoC should be synthesized. Luckily, SystemVerilog is fairly self-describing. Once you’ve found the top-level, usually a file with the word top in it, it’s a matter of recursively adding referenced modules until all references have been resolved. Easy enough. I added all files in a Vivado project file. It’s checked in here:
https://github.com/epsilon537/boxlambda/tree/hello_world/fpga/vivado/hello_world
Simulating and Running the SoC
Initially, nothing worked, of course. There are always bugs. There were bugs in the link.ld script, in the Vivado constraints file, in the top-level file ibex_soc.sv… I even managed to make a mistake in the simple hello.c test code. Guess what’s wrong with this code:
int main(void) {
	uart_init(&uart0, (volatile void *) PLATFORM_UART_BASE);
	uart_set_baudrate(&uart0, 115200, PLATFORM_CLK_FREQ);
	uart_printf(&uart0, "Hello World!\r\n");
	return 0;
}
The problem is that main() returns after printing Hello world. Returning from main() causes the system to restart. As a result, I was only seeing HHHHH… on the serial port. The system was restarting before the rest of (H)ello world made it out to the serial port. As a fix, I added a while() loop after the uart_printf() statement.
I was able to find these issues by loading the design in the Vivado simulator and looking at the waveforms (CPU bus transactions, state of the UART transmit FIFO, etc.). Getting the simulation going was not straightforward either, however. Vivado tripped over the compilation of a .c file, code-generated by Vivado itself. By looking at the references in the failing code, I was able to trace the issue back to a specific SystemVerilog code snippet in the ibex code base. I filed a bug report for it:
https://github.com/lowRISC/ibex/issues/1679
In the BoxLambda ibex fork, I disabled that code fragment (the fragment isn’t critical for the execution of the processor) and now the simulation is working fine.
After sorting out the above issues, I can finally load the FPGA bitstream onto my Arty-A7, and I’m greeted by this happy message:
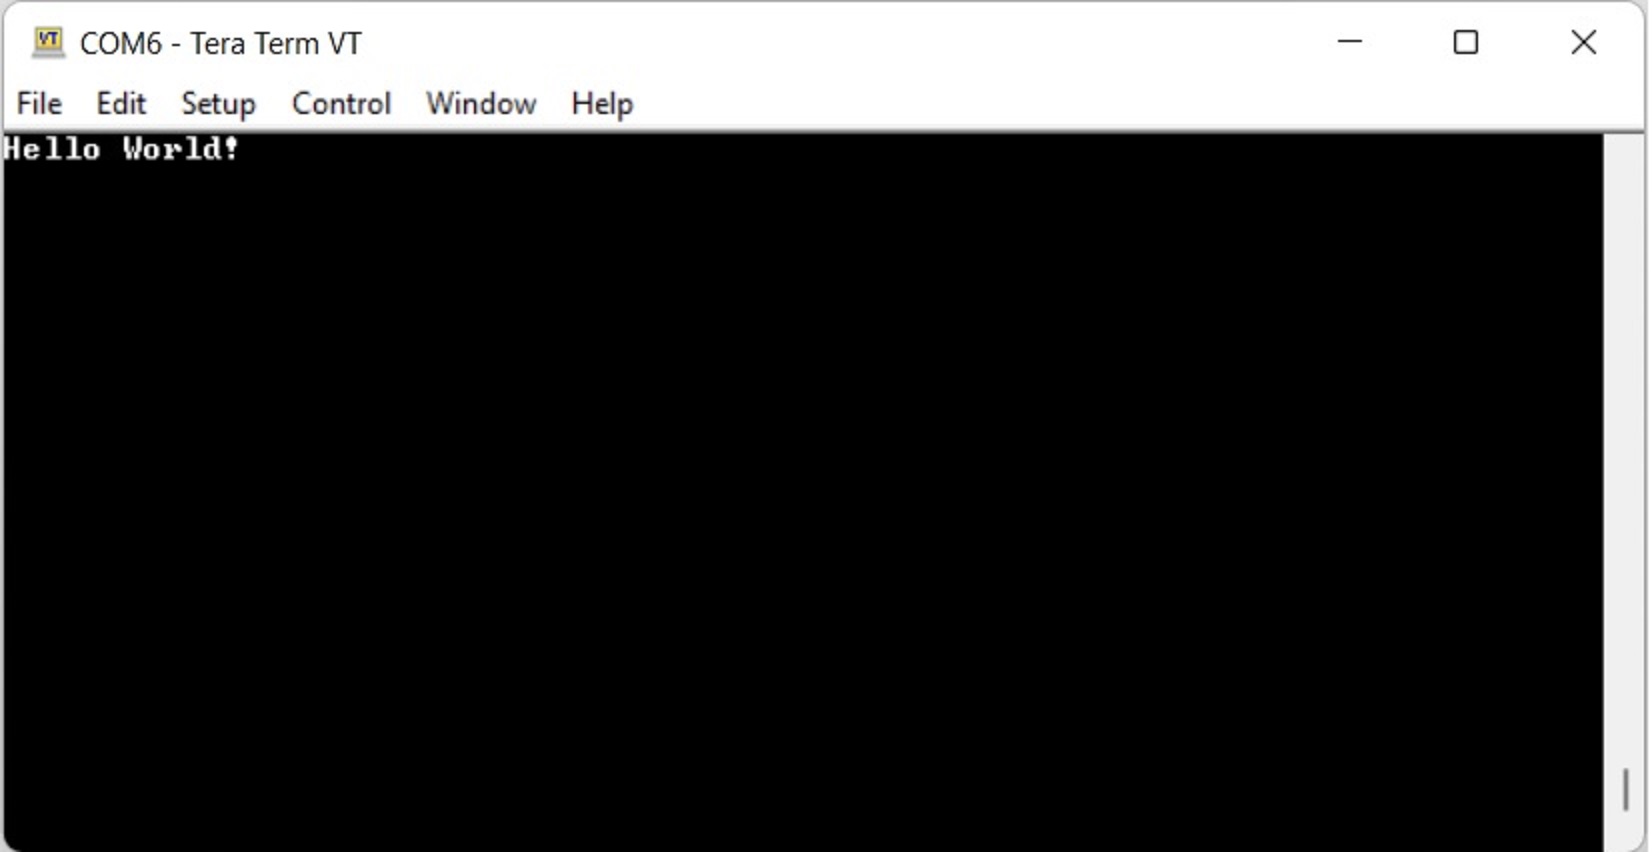 Hello World! from ibex_wb on Arty A7-35T
First Iteration complete
The build is rough around the edges. Vivado reports synthesis and implementation warnings. The .xpr project file is just a blob of files without organization. But I do have a tiny, working project. The first iteration is complete. Feel free to try it out:
- Install the prerequisites.
- git clone https://github.com/epsilon537/boxlambda/,
- cd boxlambda
- Switch to the hello_world tag: git checkout hello_world.
- Get the submodules: git submodule update –init –recursive.
- Build the software:
- cd fpga/ibex_wb/soc/fpga/arty-a7-35/sw/examples/hello
- make
- Open project file fpga/vivado/hello_world/hello_world.xpr in Vivado.
- In Vivado, start a simulation, or synthesize the design and generate a bitstream to load onto your Arty A7-35T.
Architecture Diagram updates
As it turns out, my initial Architecture Diagram was more accurate than the correction in the follow-up post. The timer is not internal to the Ibex core. It’s just another core on the Wishbone bus. The same thing goes for the riscv-dbg core. Here’s the updated diagram. I highlighted the changes.
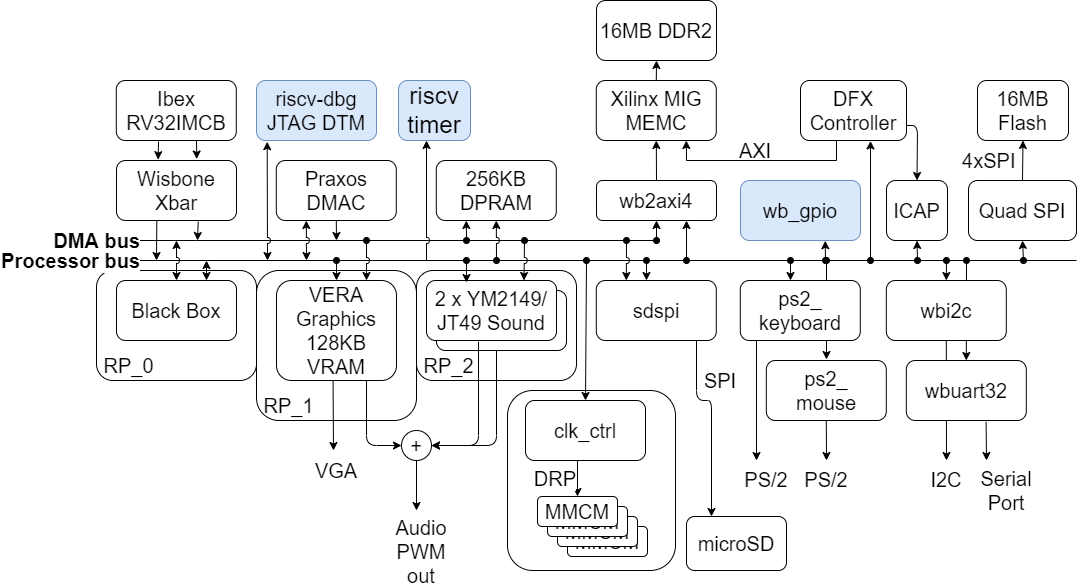 BoxLambda Architecture Block Diagram (Nexys version)
FPGA Utilization updates
The riscv-dbg core is not a trivial module. It contains quite a bit of logic as well as internal memory. Its footprint needs to be taken into account in the utilization tables.
Estimated FPGA Resource Utilization on Nexys A7-100T:
| Resources Type | DPRAM | Vera | Ibex RV32IMCB | riscv-dbg | MIG | Dual JT49 | Praxos DMA | ps2 keyb. | ps2 mouse |
|---|---|---|---|---|---|---|---|---|---|
| Slice LUTs | 0 | 2122 | 3390 | 5673 | 416 | 554 | 380 | 205 | 205 |
| Slice Registers | 0 | 1441 | 911 | 426 | 5060 | 622 | 167 | 185 | 185 |
| Block RAM Tile | 64 | 41 | 0 | 0 | 1 | 0.5 | 0 | 0 | |
| DSPs | 0 | 2 | 1 | 0 | 0 | 0 | 0 | 0 |
| Resources Type | sdspi | wbi2c | wbuart | Quad SPI | Margin Pct. | Total (incl. margin) | Avl. Resources | Pct. Utilization |
|---|---|---|---|---|---|---|---|---|
| Slice LUTs | 536 | 393 | 438 | 440 | 20.00% | 17702 | 63400 | 27.92% |
| Slice Registers | 324 | 114 | 346 | 641 | 20.00% | 13268 | 126800 | 10.46% |
| Block RAM Tile | 1 | 0 | 0 | 0 | 20.00% | 129 | 135 | 95.56% |
| DSPs | 0 | 0 | 0 | 0 | 20.00% | 3.6 | 240 | 1.50% |
Estimated FPGA Resource Utilization on Arty A7-35T:
| Resources Type | DPRAM | Vera | Ibex RV32IMCB | riscv-dbg | MIG | Dual JT49 | Praxos DMA | ps2 keyb. | ps2 mouse |
|---|---|---|---|---|---|---|---|---|---|
| Slice LUTs | 0 | 2122 | 3390 | 5673 | 416 | 554 | 380 | 205 | 205 |
| Slice Registers | 0 | 1441 | 911 | 426 | 5060 | 622 | 167 | 185 | 185 |
| Block RAM Tile | 16 | 25 | 0 | 0 | 1 | 0.5 | 0 | 0 | |
| DSPs | 0 | 2 | 1 | 0 | 0 | 0 | 0 | 0 |
| Resources Type | sdspi | wbi2c | wbuart | Quad SPI | Margin Pct. | Total (incl. margin) | Avl. Resources | Pct. Utilization |
|---|---|---|---|---|---|---|---|---|
| Slice LUTs | 536 | 393 | 438 | 440 | 20.00% | 17702 | 20800 | 85.11% |
| Slice Registers | 749 | 324 | 346 | 641 | 20.00% | 13268 | 41600 | 31.90% |
| Block RAM Tile | 1 | 0 | 0 | 0 | 10.00% | 48 | 50 | 95.70% |
| DSPs | 0 | 0 | 0 | 0 | 20.00% | 4 | 90 | 4.00% |
Interesting Links
https://opentitan.org/: It doesn’t take a lot of digging to find your way from the Ibex project to OpenTitan. OpenTitan is a very complete ecosystem for RISCV-based SoCs. OpenTitan is using the TileLink bus protocol rather than Wishbone. To be honest, discovering OpenTitan and TileLink triggered a bit of an existential crisis for BoxLambda. Wouldn’t it be better for BoxLambda to use TileLink and OpenTitan as a baseline instead of Wishbone and the collection of components? I eventually decided to stay the course. BoxLambda will hopefully be a long-running project and, now and then, cool new stuff is bound to cross my path. It wouldn’t be good for the project to switch directions every time I come across another interesting project.